Disclaimer: This post may contain affiliate links. Please read my disclosure policy for more details.
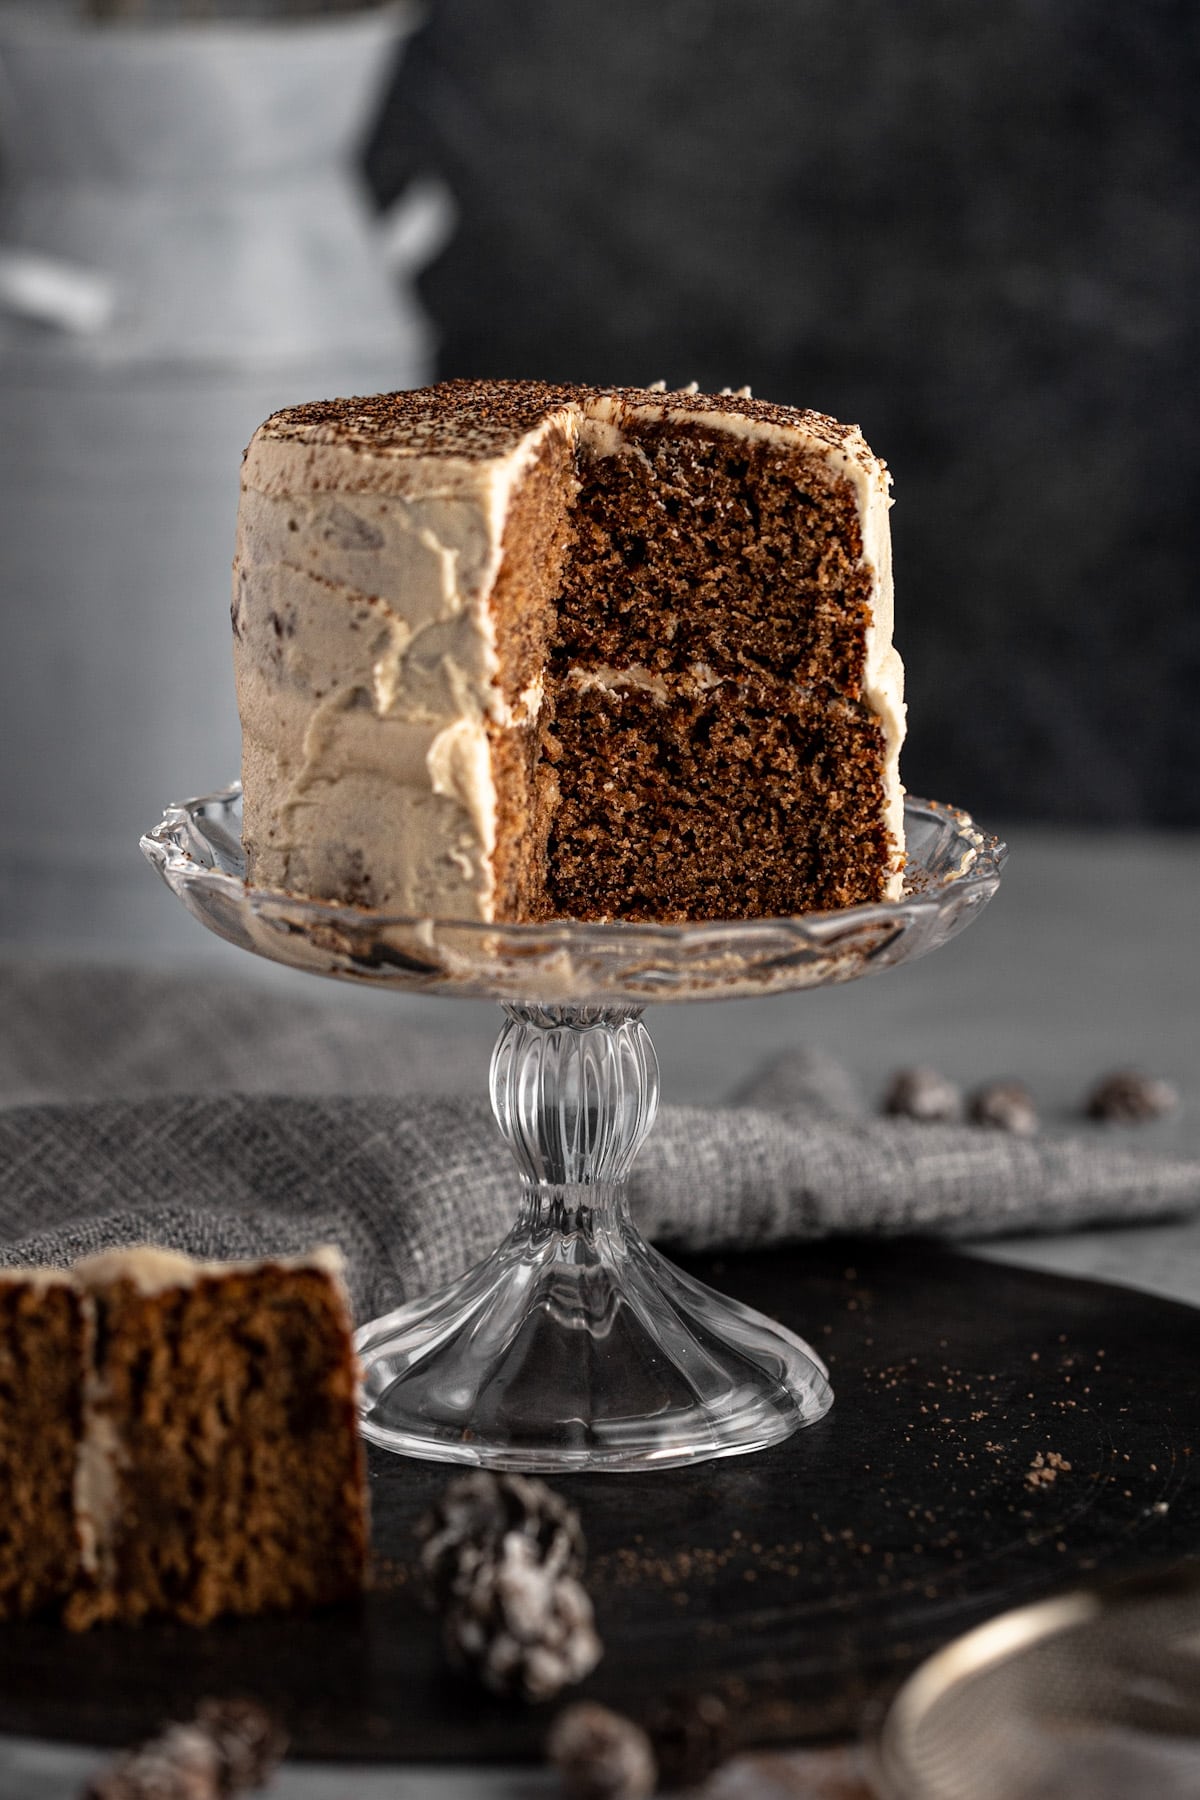
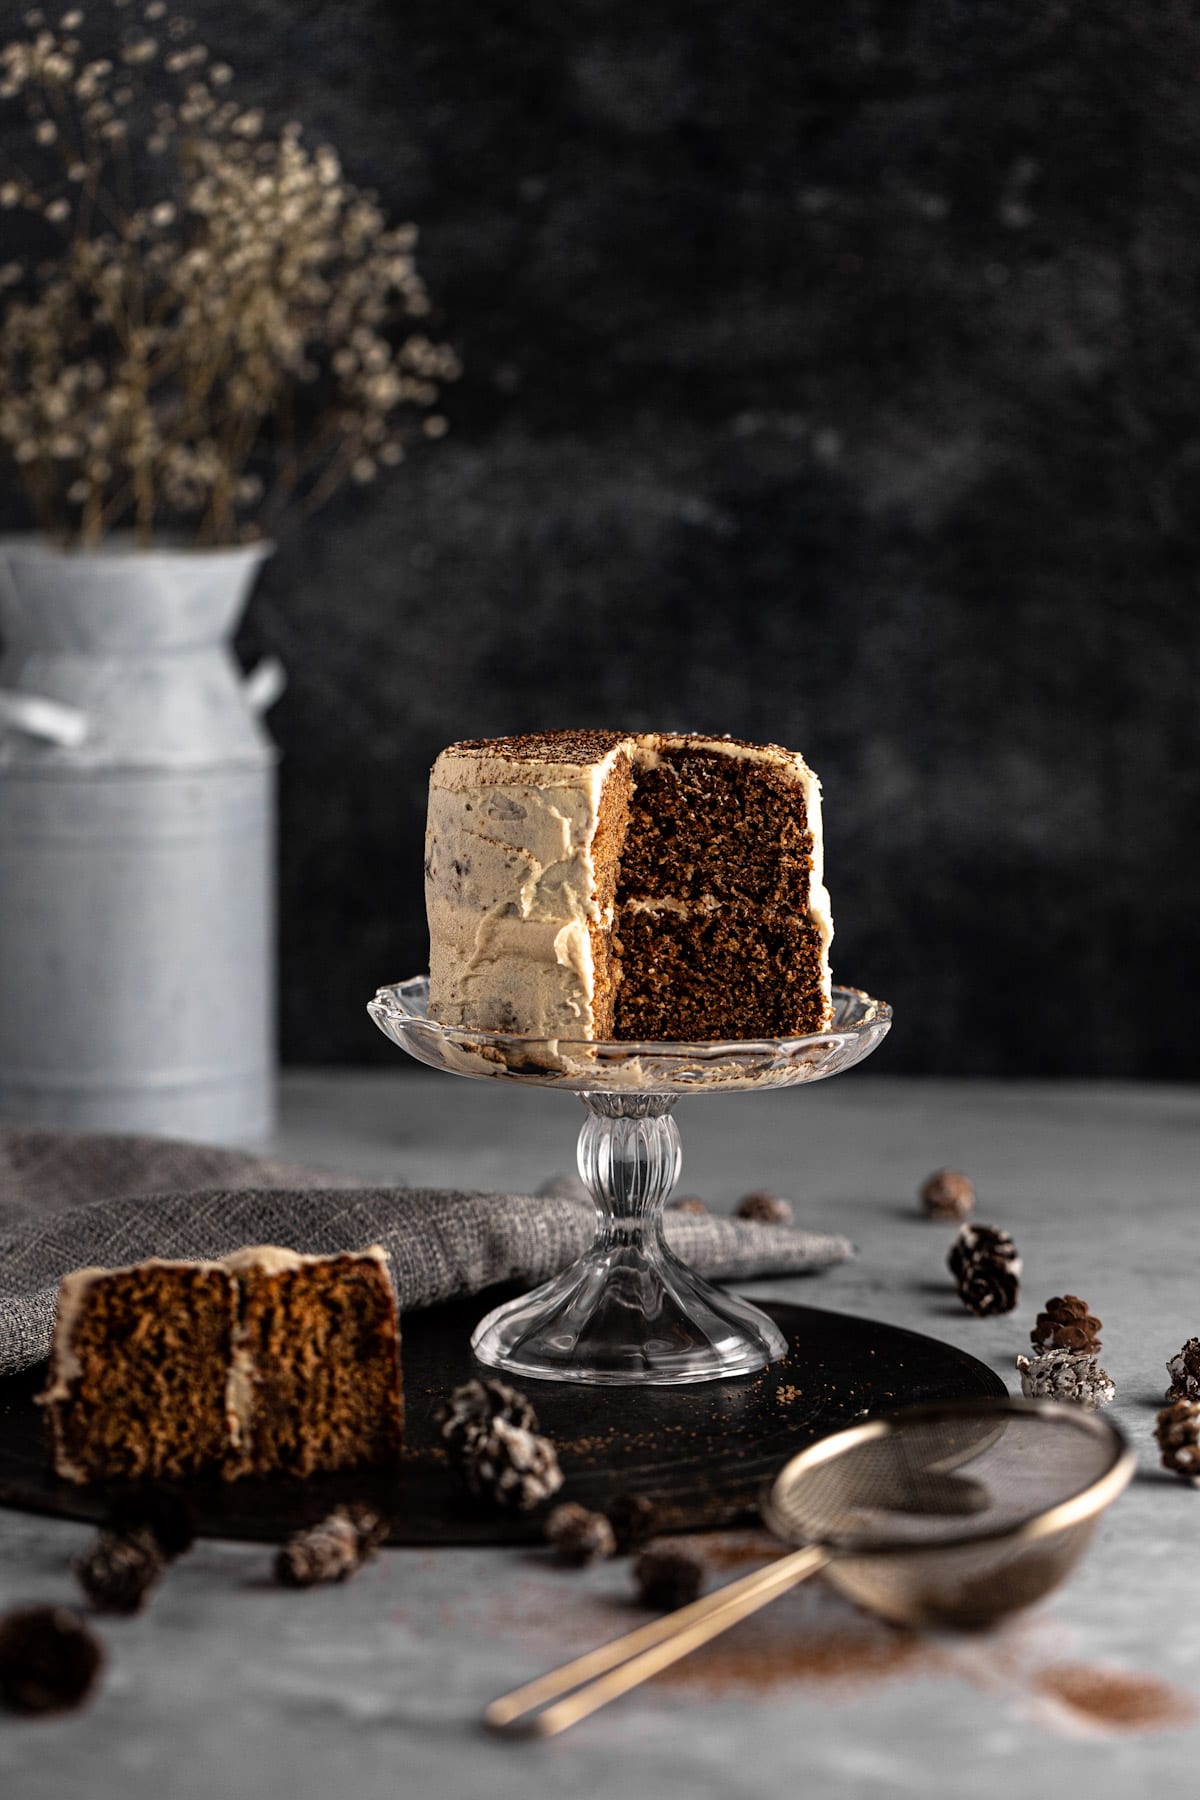
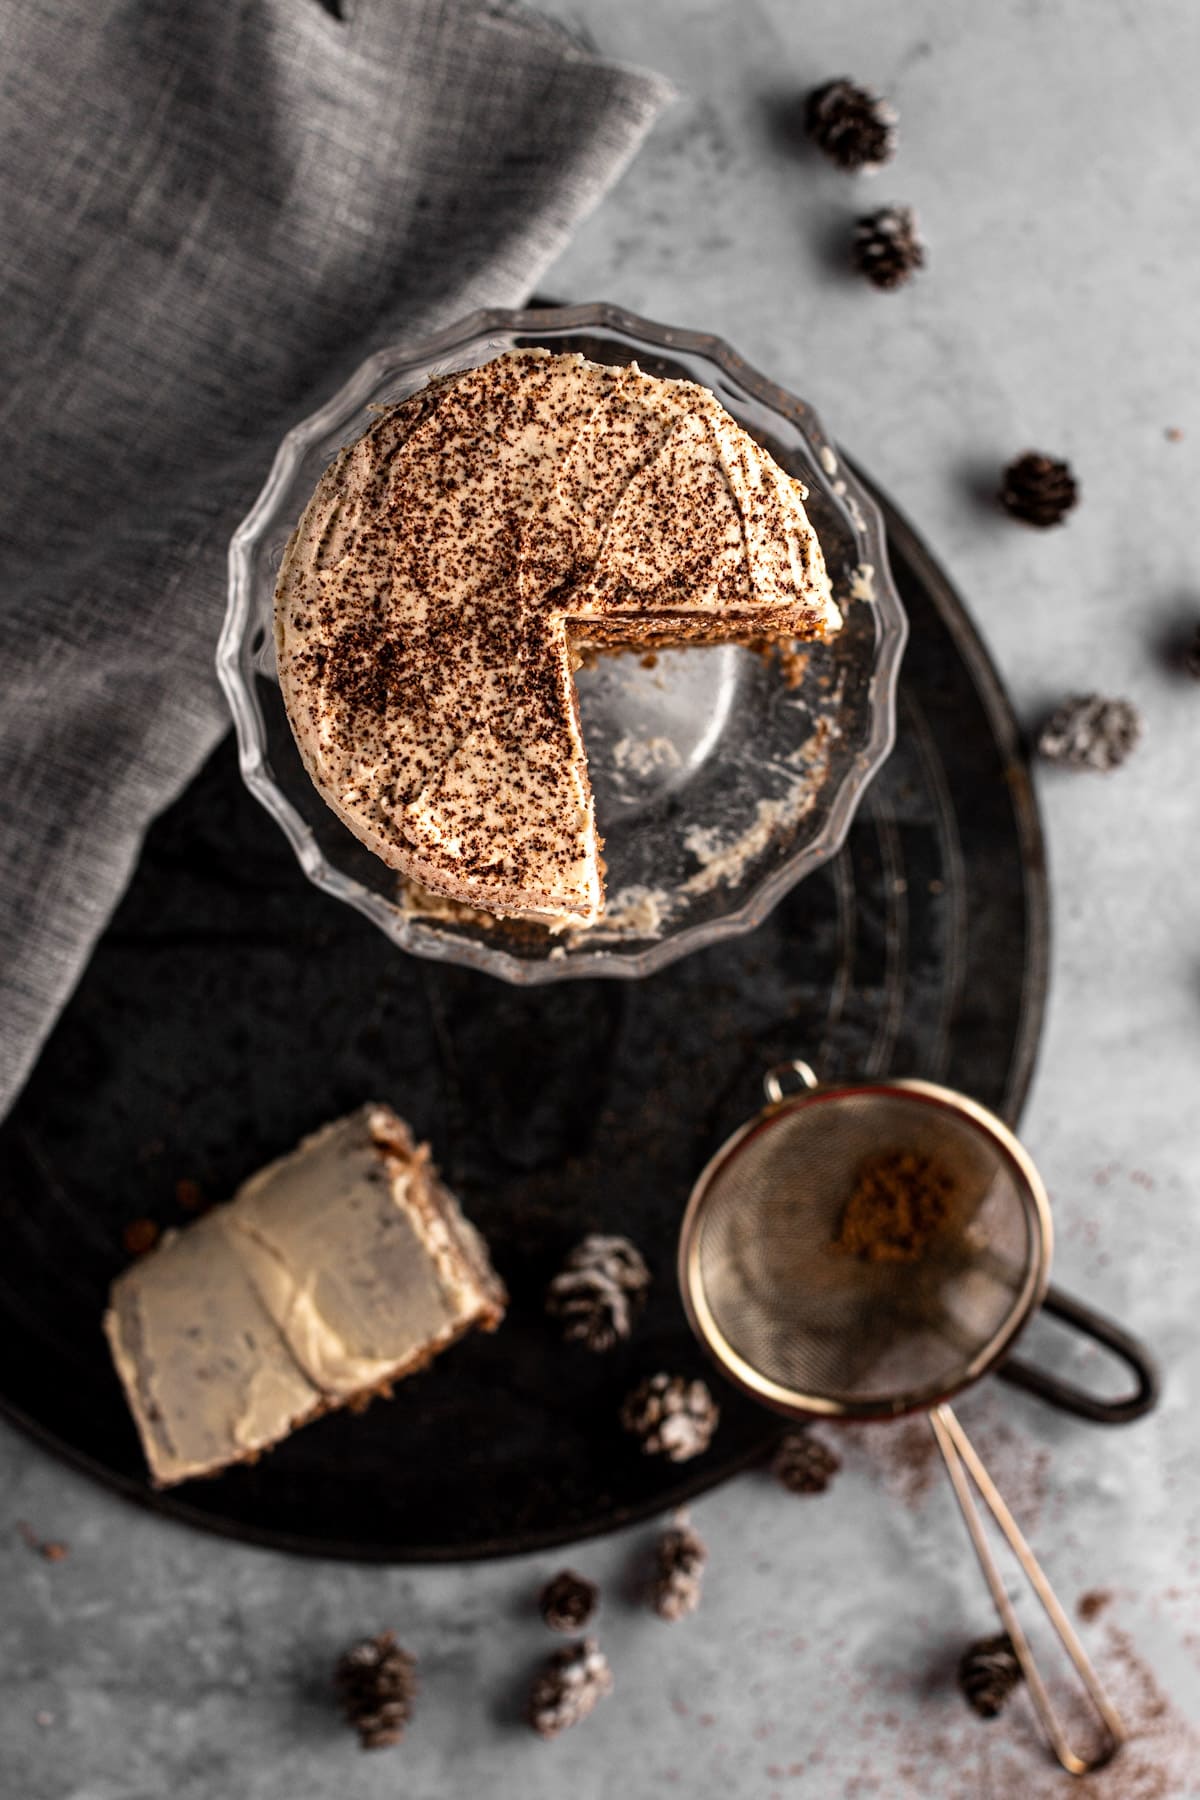
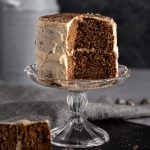
This mini layer cake is the perfect cake to make for a special occasion with just a handful of people. A rich, chocolate 4 inch, 2 layered cake that serves 4 to 6 people. Elegant, simple and easy to make.
Cakes, such as this coffee & banana cake or this pear & raspberry cake are delicious and simple to make.
But sometimes, if you are just a few people, they can be too big and you end up with too many leftovers.
This mini layer cake is the perfect cake recipe when you still want a fancy cake, but don’t want to be wasteful.
Jump to:
Recipe Highlights
- It’s the perfect size for 4 to 6 people. Perfect for a family dinner or a small get together with friends. It makes 4 decently sized cake slices or 6 smaller slices.
- It is made with mini cake pans. Other recipes use cookie cutters to cut out layers from a sheet cake. This is a lot more work, creates a lot of excess cake and doesn’t look as professional. Mini cake pans make the process so easy.
- It is a delicious, rich chocolate cake. This cake is so tasty! Plus, there are so many great combinations of frosting you can use to customize it how you like.
Ingredients
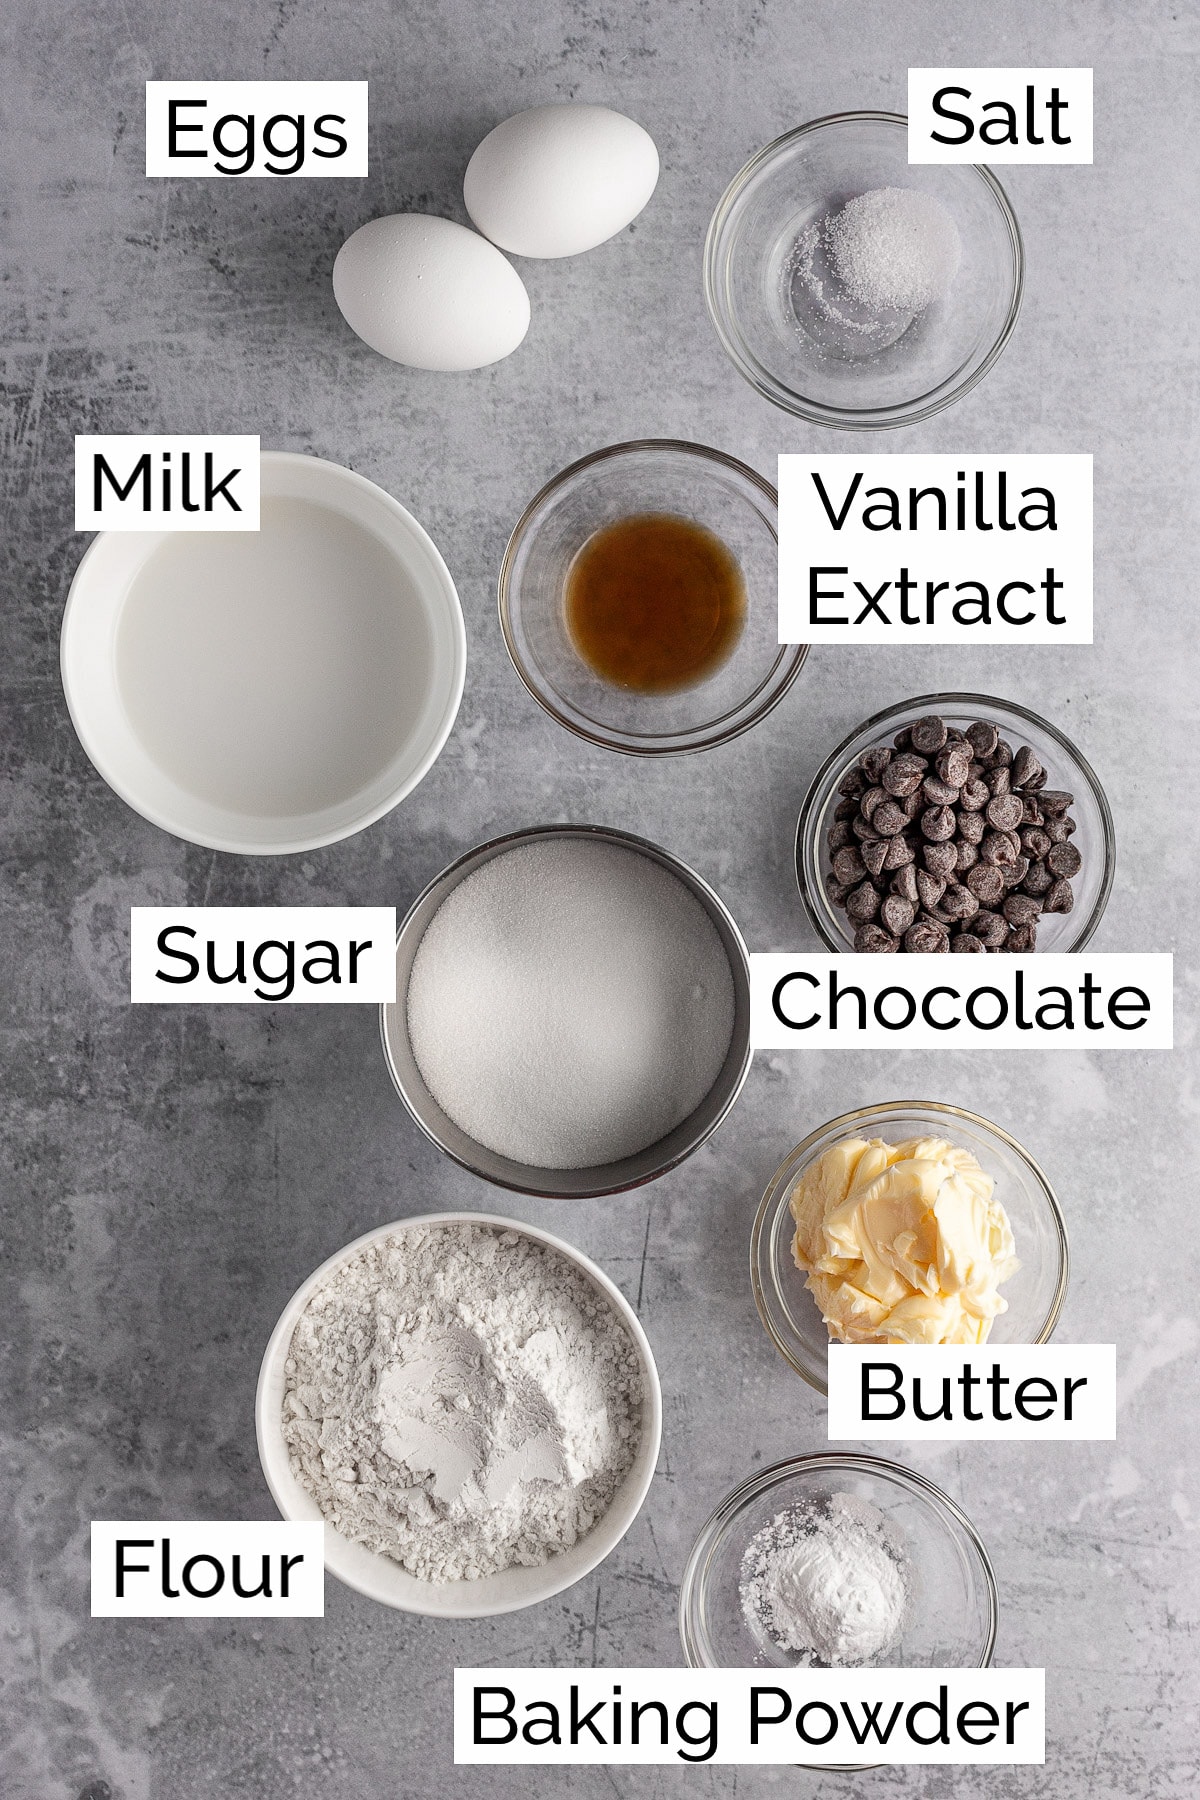
- Chocolate Chips or Baking Chocolate: Use semi-sweet chocolate chips or semi-sweet baking chocolate. This is melted and mixed into the batter.
- Sugar: Use granulated sugar rather than brown sugar.
- Butter: Use unsalted butter. You can substitute this with margarine.
- Egg Yolks: Egg yolks act as a binding agent and give the cake moisture.
- Vanilla Extract: Just a dash of vanilla extract for flavor.
- Milk: Use regular 2% milk.
- Flour: Use all-purpose flour.
- Baking Powder: Use baking powder (not baking soda). This will help the cake rise.
- Salt: A dash of salt brings out the other flavors.
Equipment
- A couple 4 inch round cake tins to bake your mini cake layers. Make sure the tins you buy are at least 2 inches tall.
- Parchment paper to line the cake tins.
- A kitchen scale for accurately measuring the ingredients.
- A hand mixer or a stand mixer to beat the butter, sugar and eggs.
- A rubber spatula to mix the ingredients together.
- Long toothpicks to test when the cakes are done cooking.
- A piping bag and piping tip if you want to decorate your mini cake with frosting.
- A cake carrier to transport your mini cake.
Instructions
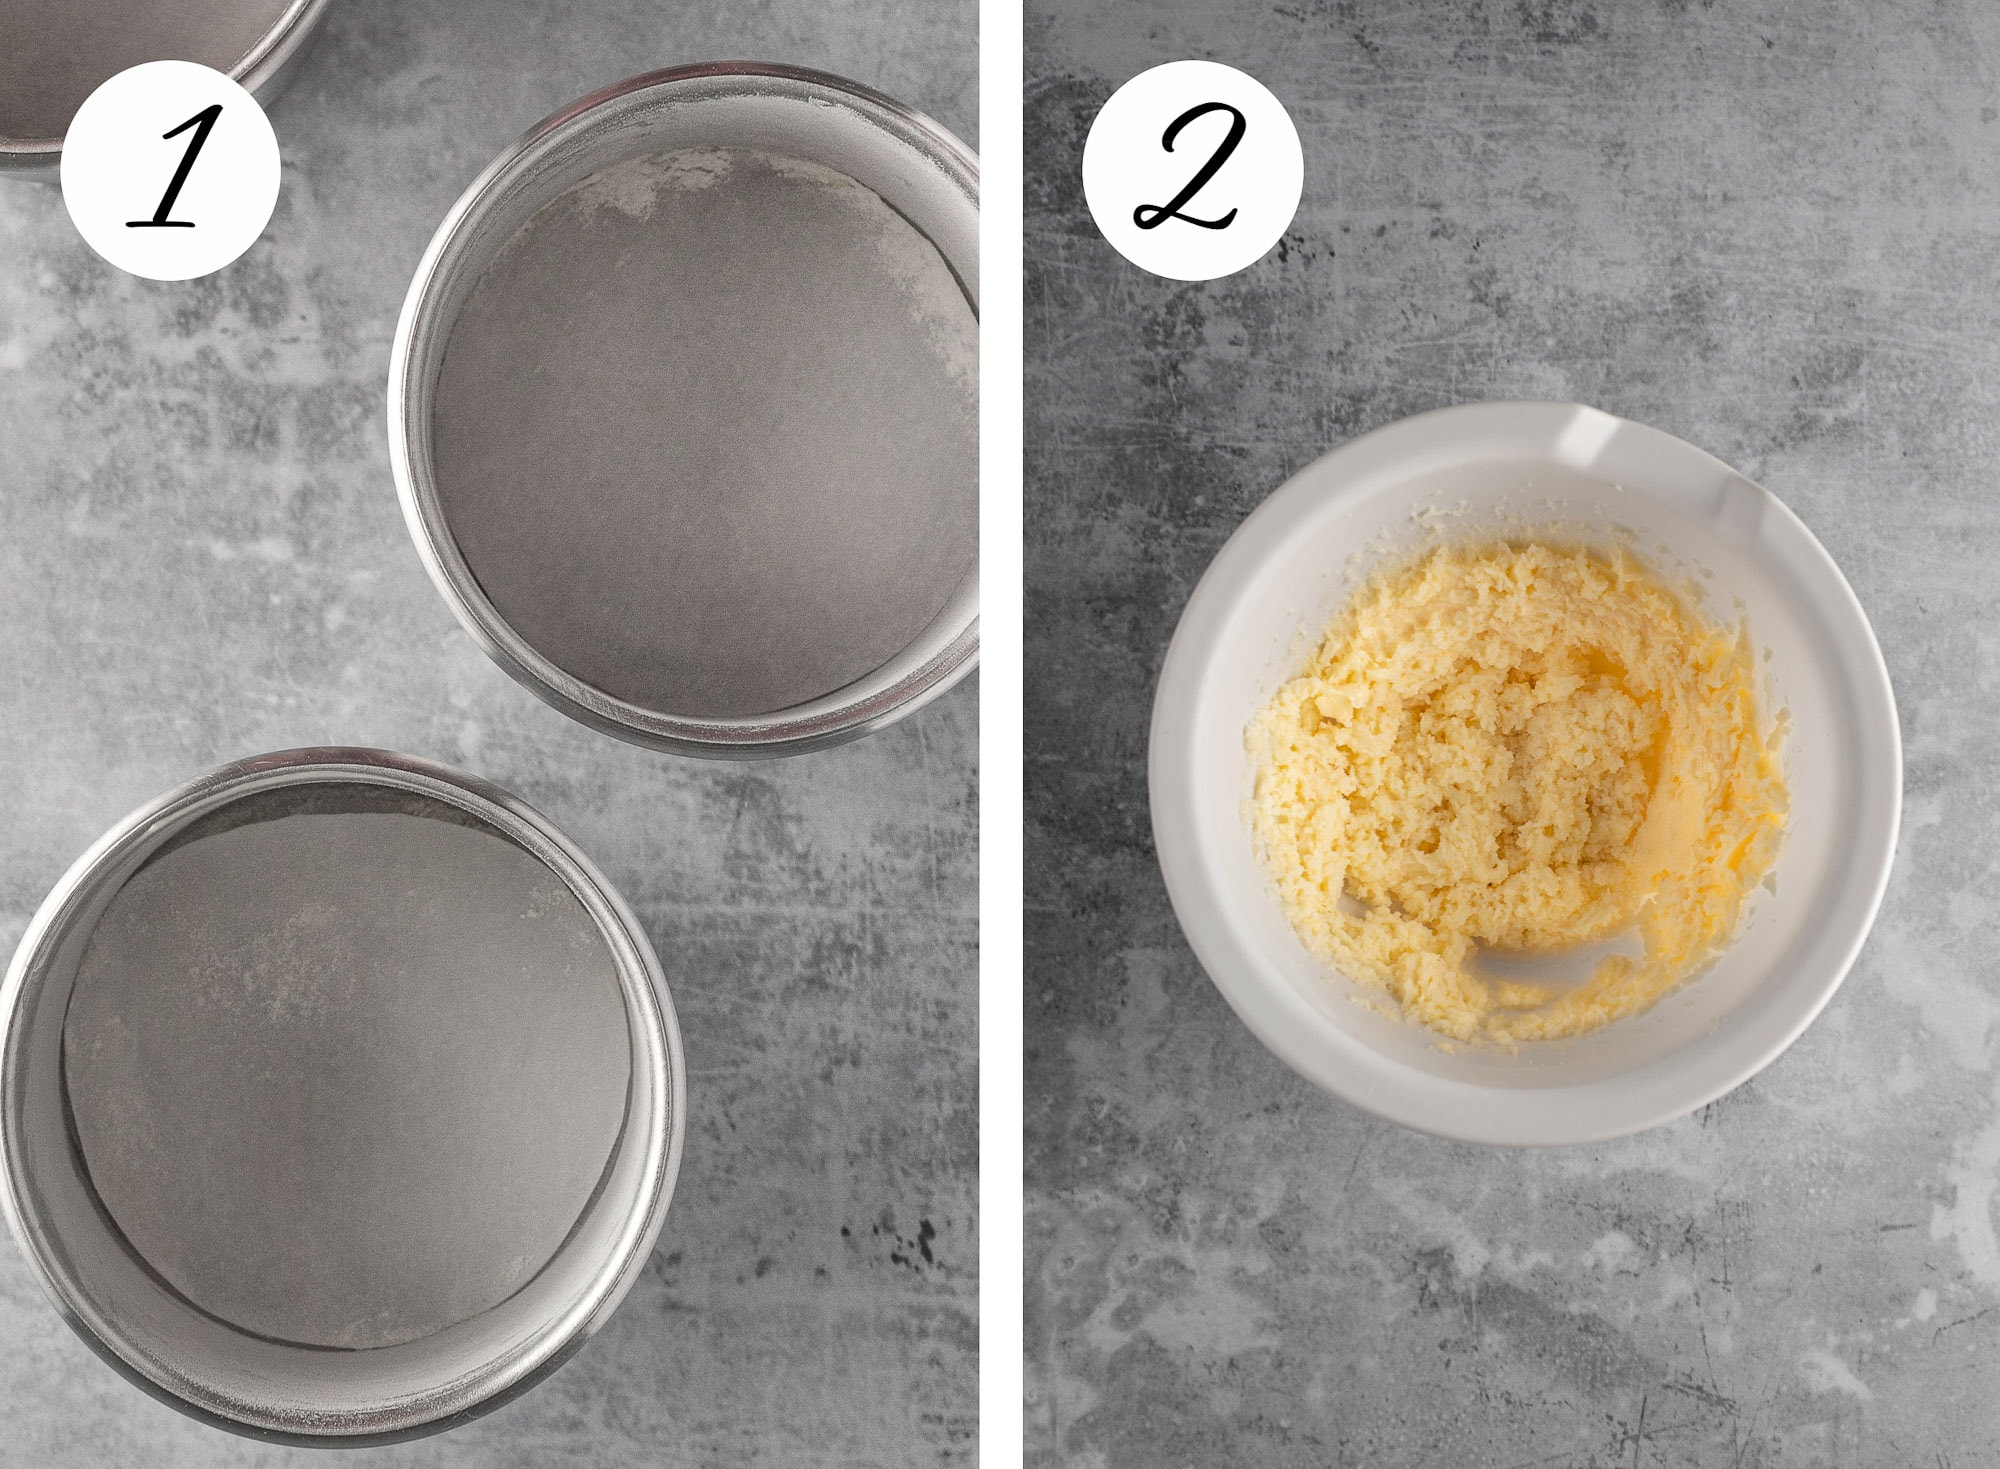
Step 1: Preheat the oven to 365F. Prepare the cake tins by lining the bottoms with parchment paper. Butter and lightly flour the sides of the pan.
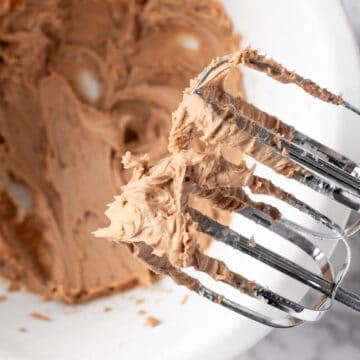
Step 2: Beat the butter and sugar together until light and fluffy.
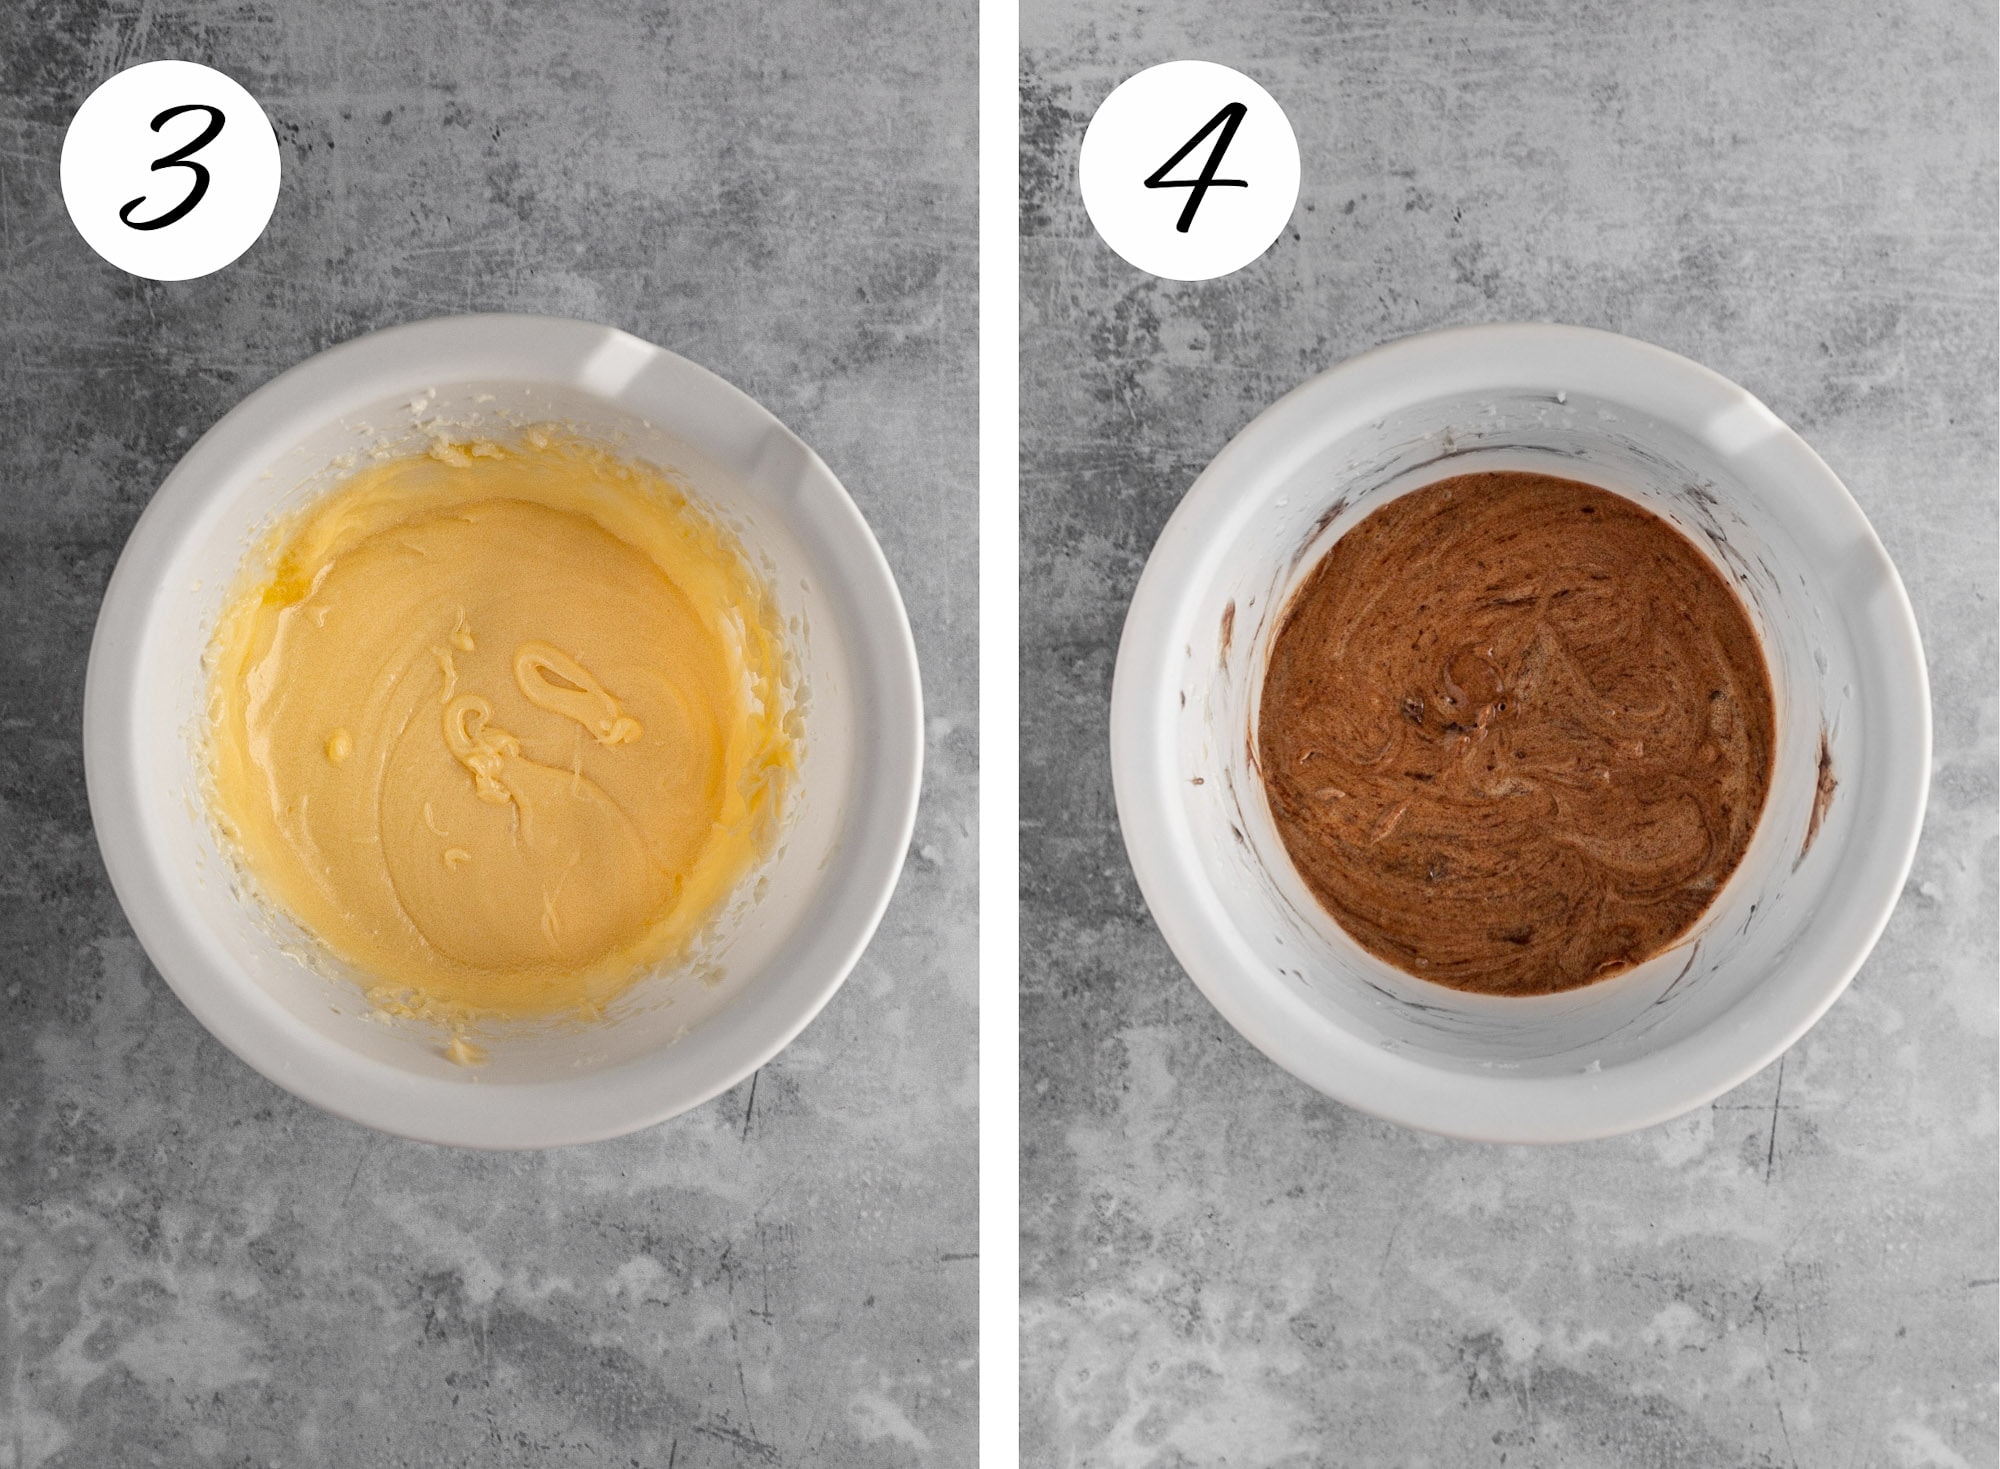
Step 3: Beat in the egg yolks and vanilla extract one at a time.
Step 4: Melt the chocolate in the microwave and mix it into the sugar and egg mixture.
Step 5: Mix the flour, baking powder and salt together. In several parts, mix the dry ingredients into the wet ingredients, alternating with mixing in the milk.
Step 6: Divide the batter evenly between the 2 mixing tins.
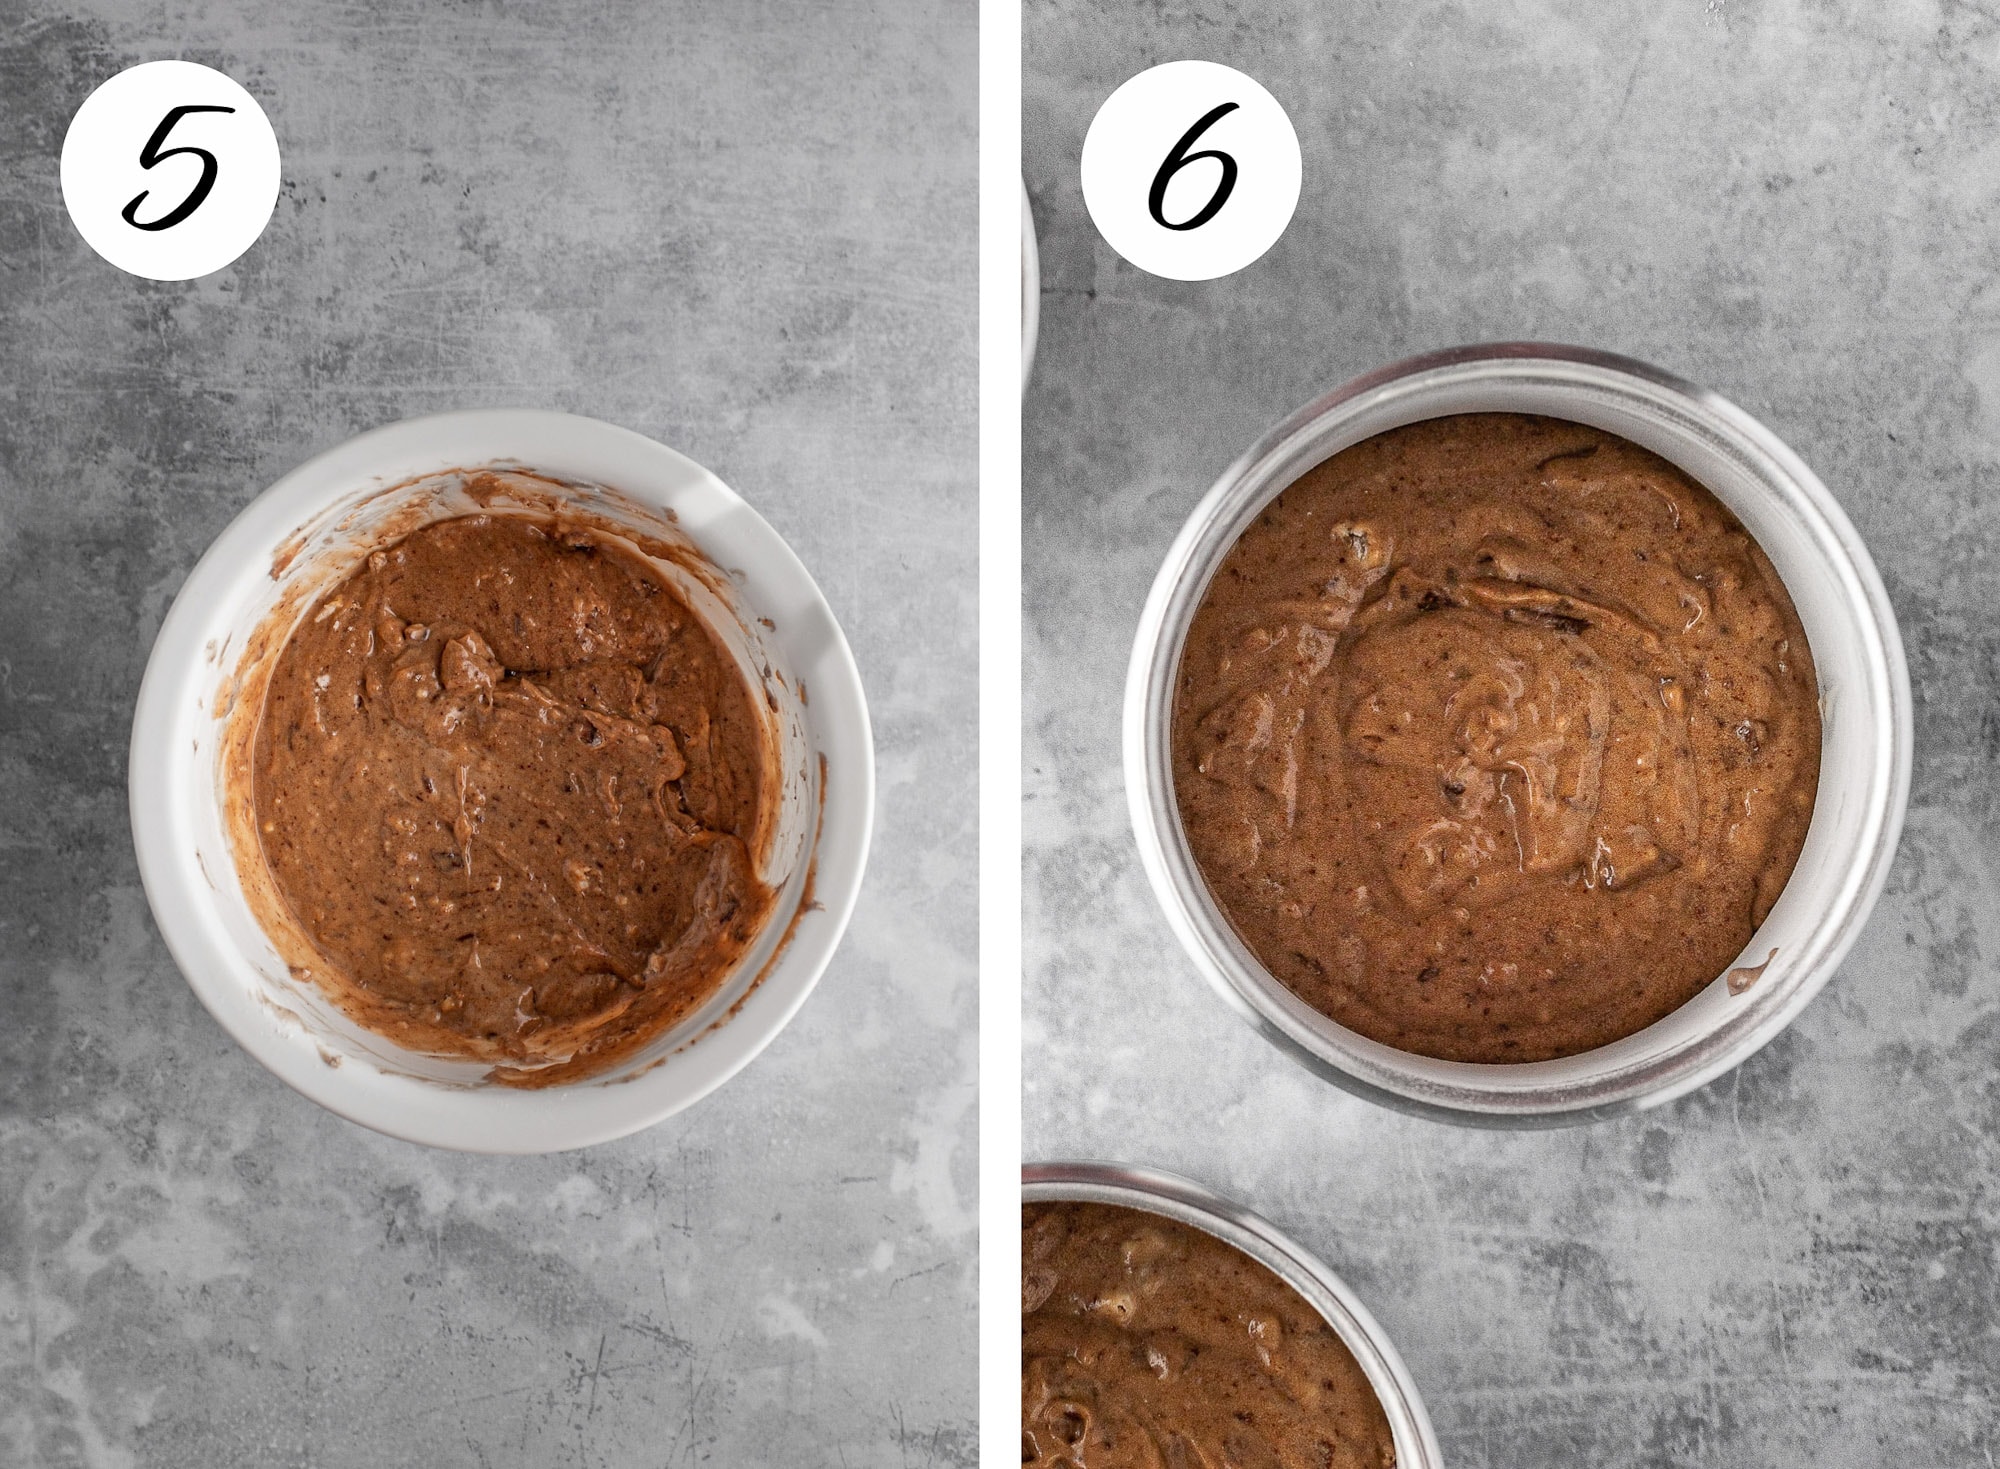
Step 7: Bake for 24-28 minutes until a toothpick comes out clean. Let the cakes cool for 15 minutes before removing them from the pans.
Step 8: Let the cakes cool to room temperature, then chill them in the freezer for 20 minutes. Frost with your favorite icing and enjoy!

Frosting Flavor Ideas
There are so many great flavor combinations you can try when it comes to choosing the frosting flavor for this mini layer cake.
My favorite is this coffee buttercream, but here are some other great ideas:
Frosting Style Ideas
When it comes to frosting your cake, there are lots of styles to choose from, depending on the look you are going for. Here are some ideas:
- Bare Cake: This style uses frosting in between the layers, but minimal frosting on the outside of the cake, giving an overall rustic feel.
- Smooth Cake: This style looks like a perfectly finished cake with thick, smooth icing all around the edge of the cake.
- Textured Frosting: Experiment with different styles of textured frosting.
- Ombré: Try frosting a beautiful ombré style cake with graded colors.
Cake Decoration Ideas
To finish off your mini layer cake, add some toppings or decorations of your choice:
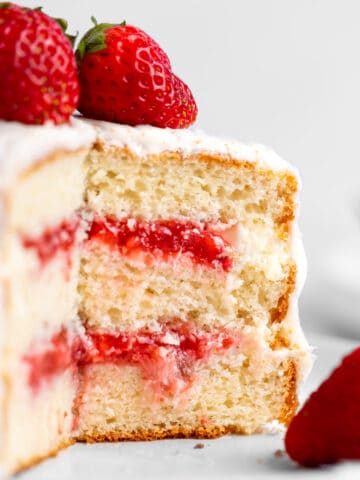
- Berries: Add a cluster of seasonal berries such as strawberries, blueberries or raspberries.
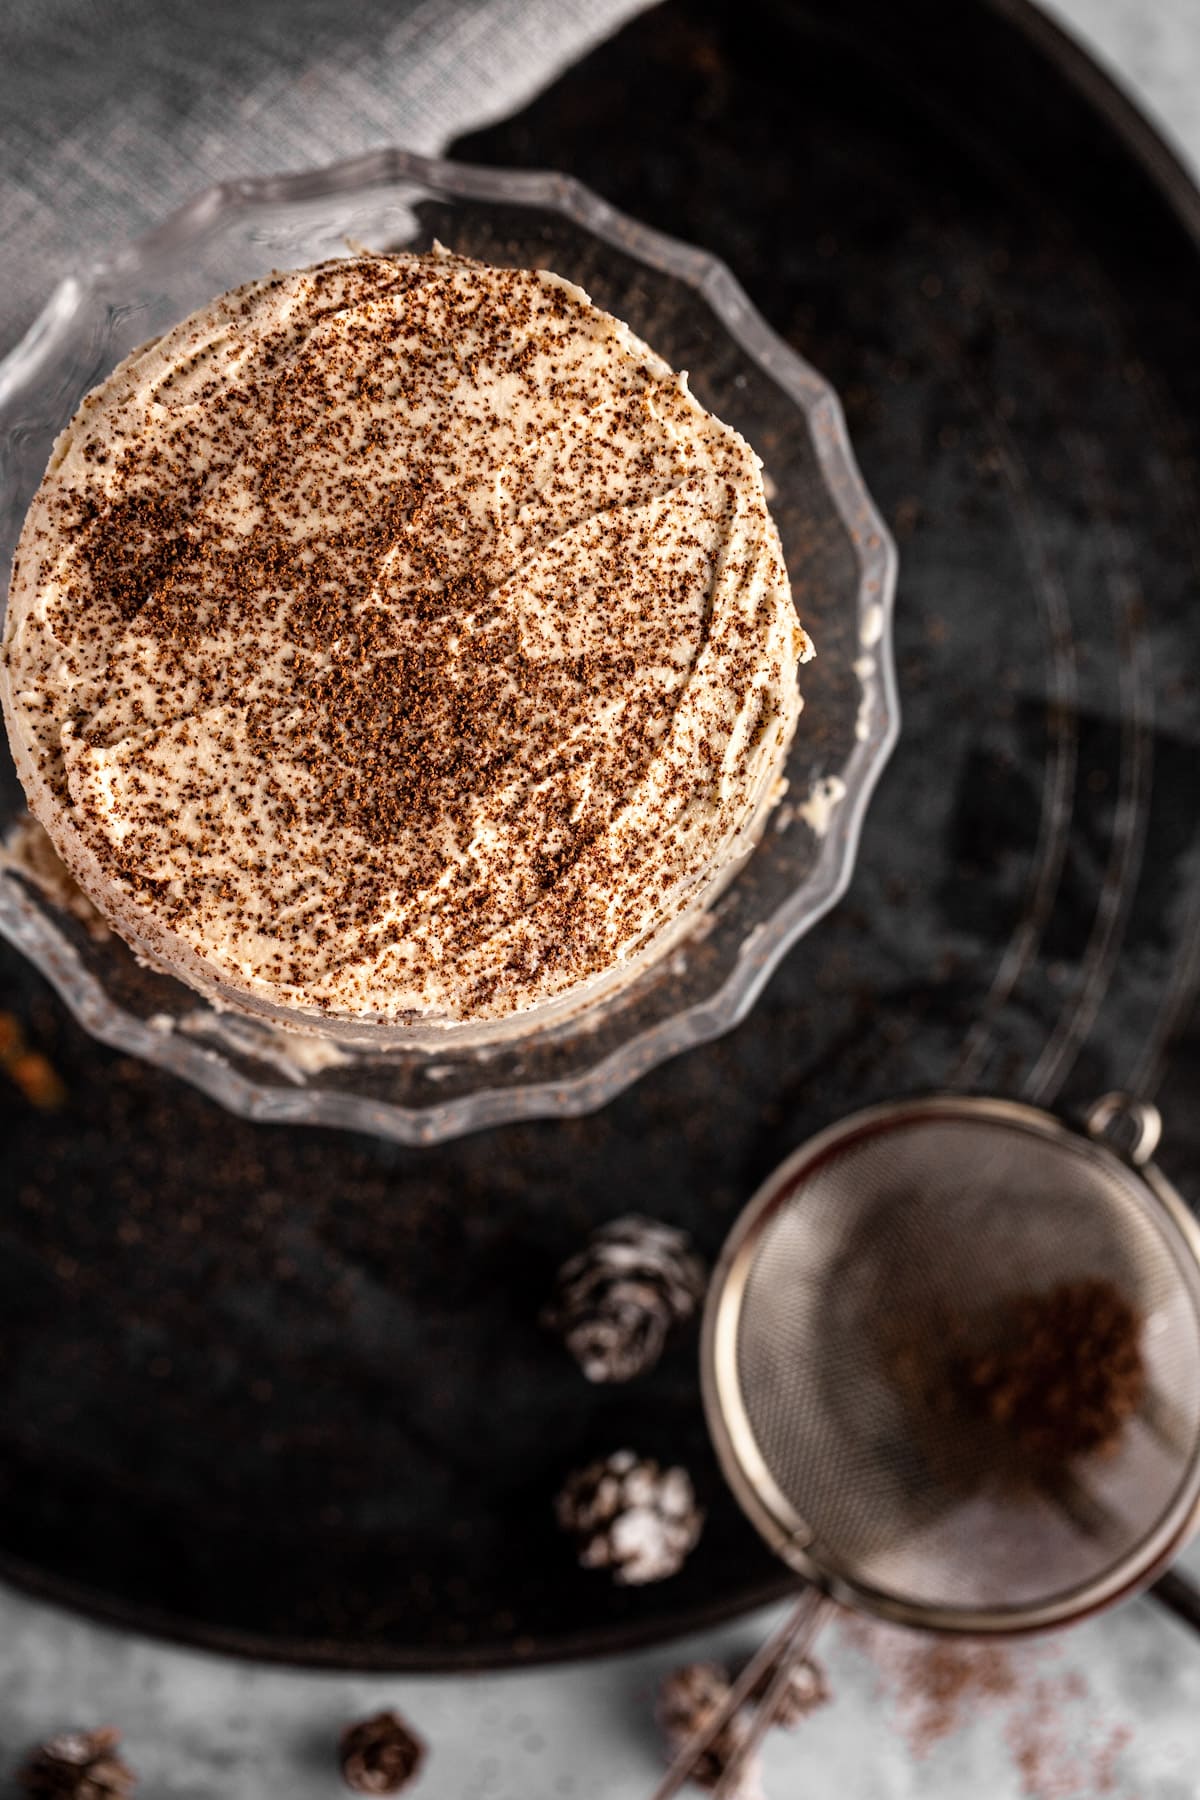
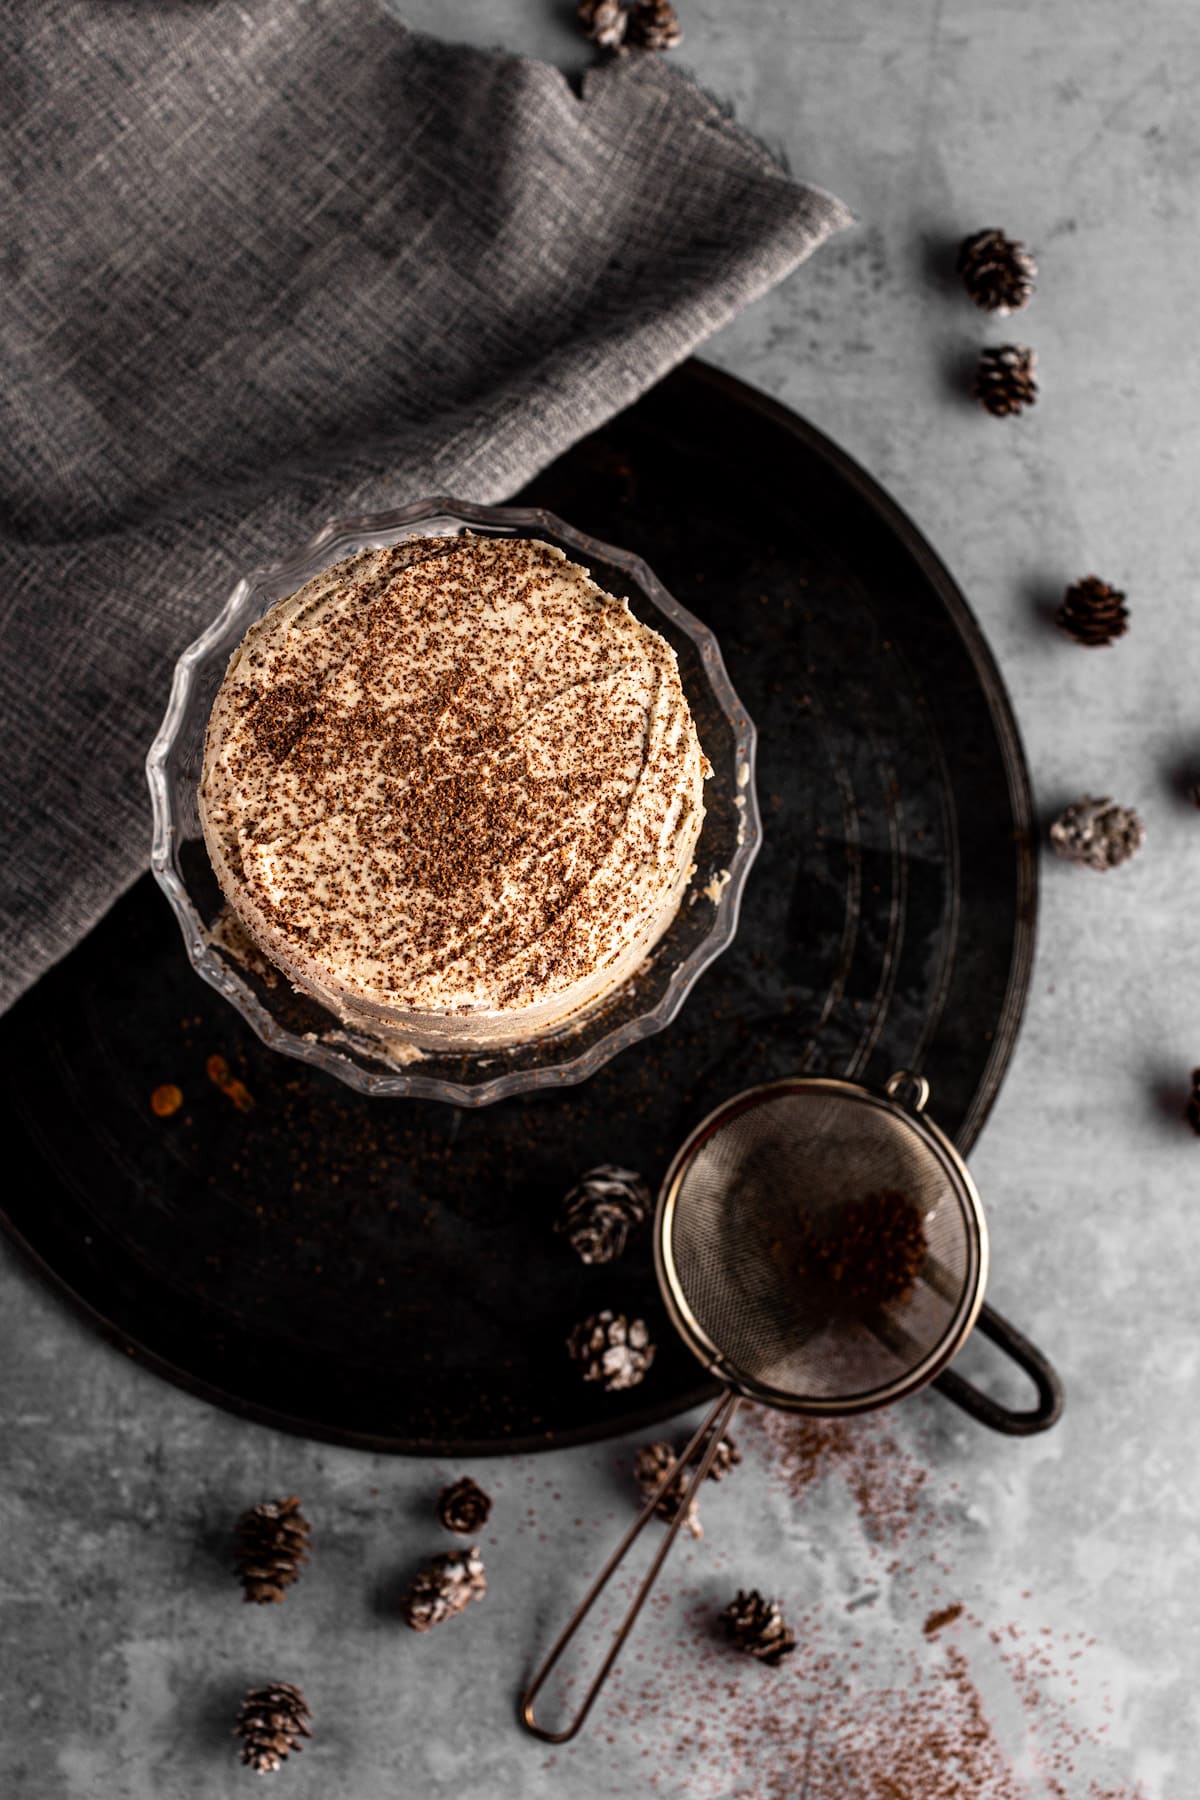
- Cocoa Powder: Add a sprinkle of cocoa powder or some chocolate shavings.
- Sprinkles: For a fun cake use multicolored sprinkles or Christmas sprinkles for a holiday cake.
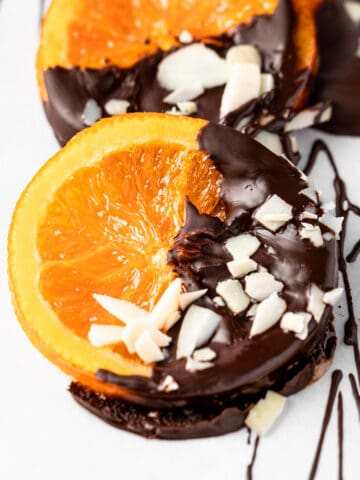
- Melted Chocolate Decorations: Melt chocolate to make decorative chocolate shapes to put on your mini cake.
- Make frosting flowers: Use colored buttercream to create a variety of frosting flowers.
Make Ahead
- Cake Layers: You can make the cake layers up to 3 months in advance. Once baked, wrap each cake layer in two layers of plastic wrap followed by a layer of aluminum foil. Store in the freezer. Thaw overnight in the fridge. Don’t unwrap the layers before they are done thawing.
- Frosting: You can make the frosting up to a week in advance. Store the frosting in an airtight container in the fridge. A typical buttercream frosting will last up to 2 weeks.
Storage
- Fridge: Store leftover frosting in an airtight container in the fridge for up to 1 to 2 weeks. Store leftover cake in an airtight container in the fridge for up to a week.
- Freezer: You can store leftover cake in the freezer, however it will mess up the icing. Wrap the cake or individual slices in two layers of plastic wrap followed by a layer of aluminum foil. Let the cake defrost in the fridge overnight before serving. Remove the wrapping once defrosted.
Expert Tips
- Use a kitchen scale. A kitchen scale is the most accurate way to measure ingredients. You can also use the scale when adding the batter to the cake tins to divide it evenly.
- Level the cake layers. If your cake layers are slightly domed at the top use a serrated knife to level them out before icing then. This is easiest to do after the layers have been chilled.
- Don’t overmix the batter. Mix just until the ingredients are combined.
- Don’t open the oven door. Use your oven light to see how the cake is baking, but don’t open the oven door. This can cause the temperature to drop and affect how the cake layers rise.
FAQ
They need to be between 2 to 3 inches tall. I use these 4 by 3 inch tall cake tins.
Buttering the sides of the pan with too much butter can lead the cake layers to be too crispy and hard on the outside. Use just a small amount of butter for the sides, and lightly dust the butter with flour.
The amount of frosting you will need entirely depends on the style of frosting you are going to use. Typically you can comfortably halve most frosting recipes and still be left with enough to cover this mini layer cake.
Related Recipes
Print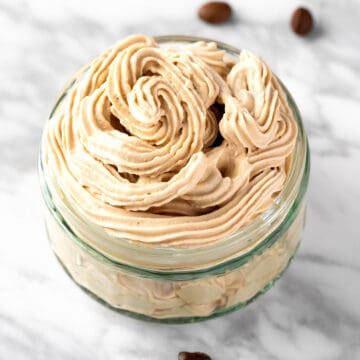

📖 Recipe
Mini Layer Cake
- Total Time: 1 hour 15 minutes
- Yield: 6 slices 1x
- Diet: Vegetarian
Description
This mini layer cake is just like a regular layered cake, but mini! Perfect for a special occasion with just a handful of people.
Ingredients
- ¼ (60g) cup butter
- ½ cup (100g) granulated sugar
- 2 egg yolks
- ½ tsp vanilla extract
- ¼ cup (43g) semisweet chocolate chips
- ⅔ cup (80g) all-purpose flour
- ½ tsp baking powder
- ⅛ tsp salt
- ¼ cup (56ml) milk
- Frosting of choice*
Instructions
- Preheat the oven to 365F. Prepare two 4 inch round cake pans. Line the bottom with parchment paper. Lightly butter and flour the sides of the pans, tapping out the excess flour.
- In a large bowl, beat the butter and sugar together for 10 to 15 seconds until light and fluffy.
- Beat in the egg yolks and vanilla extract one at a time.
- In a microwave safe bowl, melt the chocolate. Heat for 20 seconds at a time, stirring in between. Once fully melted and smooth, mix it into the egg and sugar mixture.
- In a separate medium sized bowl, mix the flour, baking powder and salt together.
- In several parts, mix the dry ingredients into the wet ingredients, alternating with adding the milk. Mix only until just combined.
- Evenly divide the batter between the two cake tins.
- Bake for 24 to 28 minutes until a toothpick comes out clean.
- Once done, let the cakes cool for 15 minutes on the counter. Gently tap the cakes out of their tins.
- Let the cakes cool completely to room temperature. Chill the layers in the freezer for 20 minutes before icing them.
- If needed, level the cake layers. Add a layer of frosting in between the cake layers before stacking them. Continue to frost the rest of the cake. Enjoy!
Notes
- * Frosting: I used this espresso buttercream frosting but you can use any type you like. The amount of frosting needed will depend on your frosting method. See the blog post for more information.
- Use the right cake tins. Use cake tins that are 4” in diameter and at least 2” tall. I use these 4” by 3” tall round cake tins.
- Use a kitchen scale. A kitchen scale is the most accurate way to measure ingredients. You can also use the scale when adding the batter to the cake tins to divide it evenly.
- Nutritional Info: The nutritional information is calculated without frosting.
- Prep Time: 50 minutes
- Cook Time: 25 minutes
- Category: Dessert
- Method: Baked
- Cuisine: American
Nutrition
- Serving Size: 1 slice
- Calories: 243
- Sugar: 21.1g
- Sodium: 133mg
- Fat: 12.2g
- Saturated Fat: 7.1g
- Unsaturated Fat: 4.3g
- Trans Fat: 0.4g
- Carbohydrates: 32.1g
- Fiber: 0.8g
- Protein: 3g
- Cholesterol: 84mg


Lima Ekram
This looks so delicious! This is just the right size for our family!
Kushigalu
WOW! This cake looks gorgeous. Thanks for the recipe.
Michelle
Made this for my nephew's mini birthday party, and it was perfect for our small gathering. We loved the rich chocolate
Andrea
Great flavors and the perfect size for my family. No more throwing leftover cake away. Yay!
Stephanie
This mini-layer cake is so adorable and tasty! I seldom make cakes since we don't have a large family so this cake was just the right size for the four of us.
Tracy
Oh I love how this is a smaller serving! This is such a delicious and also elegant cake! Thanks so much!